
Ubuntu 14.04's package manager (apt) installs PHP 5.5 by default. Although Drupal 7 core works on PHP 5.5, some contributed modules may not. In that case, you may either need to fix the module or downgrade to a lower version of PHP. In this article, we will show you how to install PHP 5.3.29 with PHP-FPM from source on Ubuntu 14.04. On top of this, we will install Nginx and MySQL to have a working Drupal 7 website.
1) Get the latest package information
sudo apt-get update
2) Install and configure Nginx
sudo apt-get install nginx
The above command will install nginx. Now you need to configure it. Assuming that your Drupal root directory is going to be /usr/share/nginx/html, open the file /etc/nginx/sites-available/default, delete everything in it and paste the following configuration in it.
server {
    listen   80;
    server_name  default;
    access_log  /var/log/nginx/localhost.access.log;
    error_log /var/log/nginx/error.log;

    root /usr/share/nginx/html;
    index index.php;

## serve imagecache files directly or redirect to drupal if they do not exist.
    location ~* files/styles {
      access_log off;
      expires 30d;
      try_files $uri @drupal;
    }

## serve imagecache files directly or redirect to drupal if they do not exist.
    location ~* ^.+.(xsl|xml)$ {
      access_log off;
      expires 1d;
      try_files $uri @drupal;
    }

## Default location
    location / {
        try_files $uri $uri/ @drupal;
        index  index.php;
    }

    location @drupal {
        rewrite ^/(.*)$ /index.php?q=$1 last;
    }

## Images and static content is treated different
    location ~* ^.+.(jpg|jpeg|gif|css|png|js|ico|xml)$ {
      access_log        off;
      expires           30d;
    }

## Parse all .php file in the /var/www directory
    location ~ .php$ {
        include fastcgi_params;
        fastcgi_split_path_info ^(.+\.php)(.*)$;
        fastcgi_pass   backend;
        fastcgi_index  index.php;
        fastcgi_param  SCRIPT_FILENAME  $document_root$fastcgi_script_name;
        fastcgi_param  SCRIPT_NAME      $fastcgi_script_name;
        fastcgi_param  QUERY_STRING     $query_string;
        fastcgi_param  REQUEST_METHOD   $request_method;
        fastcgi_param  CONTENT_TYPE     $content_type;
        fastcgi_param  CONTENT_LENGTH   $content_length;
        fastcgi_intercept_errors        on;
        fastcgi_ignore_client_abort     off;
        fastcgi_connect_timeout 60;
        fastcgi_send_timeout 180;
        fastcgi_read_timeout 180;
        fastcgi_buffer_size 128k;
        fastcgi_buffers 4 256k;
        fastcgi_busy_buffers_size 256k;
        fastcgi_temp_file_write_size 256k;
    }

## Disable viewing .htaccess & .htpassword
    location ~ /\.ht {
        deny  all;
    }
}

upstream backend {
        server 127.0.0.1:9000;
}
Restart nginx.
sudo service nginx restart
Go to the server via the browser and you should see the following:
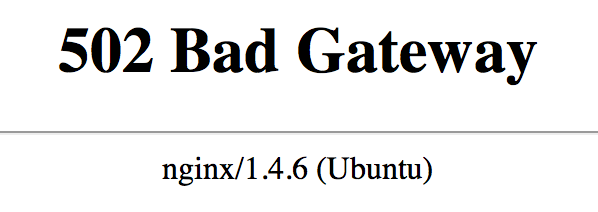
This means that nginx has been installed correctly. Now we need to install PHP-FPM.
3) Install PHP-5.3.29 with PHP-FPM
sudo apt-get install make libfcgi-dev libfcgi0ldbl libjpeg62-dbg libmcrypt-dev libssl-dev libbz2-dev libjpeg-dev libfreetype6-dev libpng12-dev libxpm-dev libxml2-dev libpcre3-dev libbz2-dev libcurl4-openssl-dev libjpeg-dev libpng12-dev libxpm-dev libfreetype6-dev libmysqlclient-dev libt1-dev libgd2-xpm-dev libgmp-dev libsasl2-dev libmhash-dev unixodbc-dev freetds-dev libpspell-dev libsnmp-dev libtidy-dev libxslt1-dev libmcrypt-dev libdb5.3-dev
PHP_VERSION=5.3.29
sudo wget -O /var/tmp/php-${PHP_VERSION}.tar.bz2 http://php.net/distributions/php-5.3.29.tar.bz2
sudo mkdir -p /opt/build
sudo tar jxf /var/tmp/php-${PHP_VERSION}.tar.bz2 -C /opt/build
sudo mkdir /usr/include/freetype2/freetype
sudo ln -s /usr/include/freetype2/freetype.h /usr/include/freetype2/freetype/freetype.h
cd /opt/build/php-${PHP_VERSION}
sudo ./configure --enable-fpm --with-mcrypt --enable-mbstring --with-openssl --with-mysql --with-mysql-sock --with-gd --with-jpeg-dir=/usr/lib --enable-gd-native-ttf --with-pdo-mysql --with-libxml-dir=/usr/lib --with-mysqli=/usr/bin/mysql_config --with-curl --enable-zip --enable-sockets --with-zlib --enable-exif --enable-ftp --with-iconv --with-gettext --enable-gd-native-ttf --with-t1lib=/usr --with-freetype-dir=/usr --prefix=/opt/PHP-5.3 --with-config-file-path=/opt/PHP-5.3/etc --with-fpm-user=www-data --with-fpm-group=www-data
sudo make
Make sure that PHP has been installed correctly.
sudo make test
Above command will run automated tests. In all the installations that I have done, I have seen that 0.5% of tests fail. That is fine. I have not seen any error while running Drupal because of these failures. Now install PHP.
sudo make install
The above command will install PHP in /opt/PHP-5.3 directory. PHP-FPM is installed in /opt/PHP-5.3/sbin folder. First let's enable the default configuration file.
sudo cp /opt/PHP-5.3/etc/php-fpm.conf.default /opt/PHP-5.3/etc/php-fpm.conf
You can start PHP-FPM by executing the command sudo /opt/PHP-5.3/sbin/php-fpm but this is not recommended as if the server reboots because of any reason, PHP-FPM won't start automatically. Let's convert PHP-FPM to a service so that reboot of the server will automatically start the PHP-FPM process.
Create a new file /etc/init.d/php-fpm and copy the following in it:
#! /bin/sh
### BEGIN INIT INFO
# Provides: php-fpm
# Required-Start: $remote_fs $syslog
# Required-Stop: $remote_fs $syslog
# Default-Start: 2 3 4 5
# Default-Stop: 0 1 6
# Description: This file starts and stops PHP-FPM
#
### END INIT INFO

PHP_DIR=/opt/PHP-5.3

case "$1" in
 start)
   $PHP_DIR/sbin/php-fpm
   ;;
 stop)
   pkill php-fpm
   ;;
 restart)
   pkill php-fpm
   sleep 5
   $PHP_DIR/sbin/php-fpm
   ;;
 *)
   echo "Usage: php-fpm {start|stop|restart}" >&2
   exit 3
   ;;
esac
Make the above file executable by everyone.
sudo chmod a+x /etc/init.d/php-fpm
Now execute the following command so that PHP-FPM will be started automatically after the service reboots.
sudo update-rc.d php-fpm defaults
Reboot the server. Once the server is back up, execute the following command:
ps aux | grep php-fpm
You should be able to see php-fpm processes that were started automatically.

Now go to the server using the browser and you show see the following error:
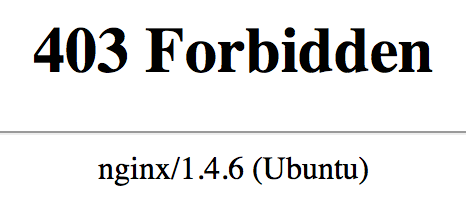
This means that Nginx and PHP-FPM are working well together. You are seeing this error because there is no index.php file in /usr/share/nginx/html folder. Let's create an index.php file in /usr/share/nginx/html folder and put the following content in it:
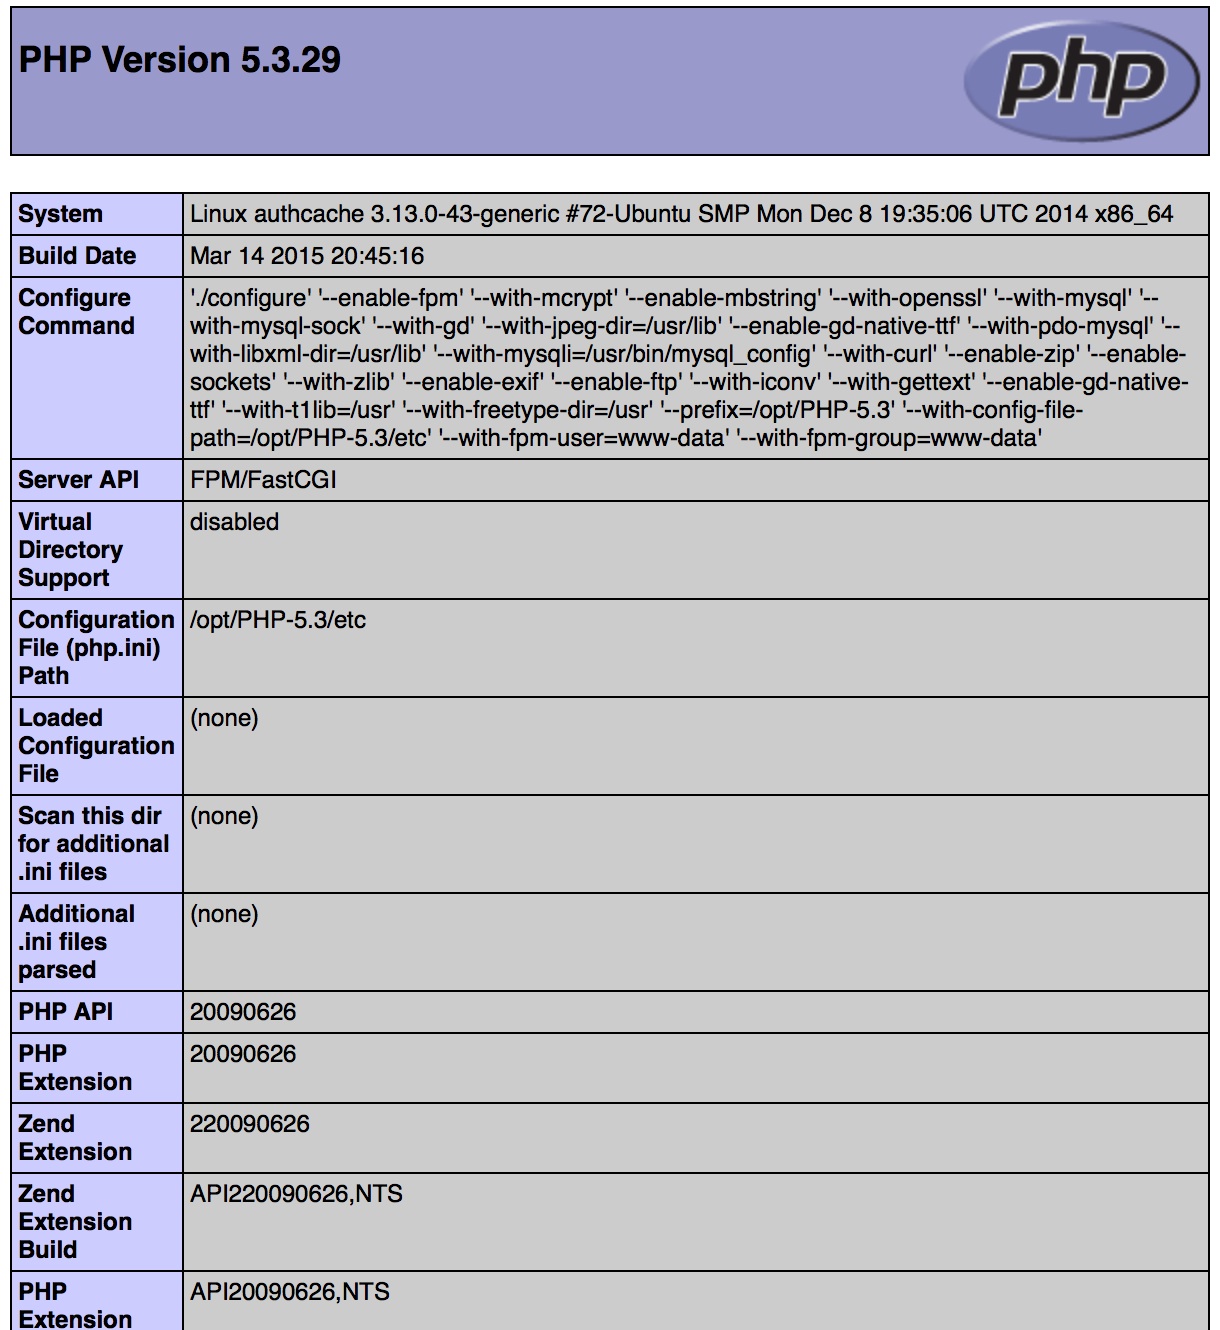
<?php
  phpinfo();
?>
Now go to the browser again and reload the webpage. You must be able to see the PHP configuration similar to the image below:
There is one more thing that we need to do that will come in handy later. We need to put PHP in executable path. Execute the following command:
sudo echo "PATH=/opt/PHP-5.3/bin:\$PATH" >> ~/.bashrc
Execute the following command to make sure that PHP is not in your executable path:
root@authcache:~# php -v
PHP 5.3.29 (cli) (built: Mar 14 2015 20:47:09)
Copyright (c) 1997-2014 The PHP Group
Zend Engine v2.3.0, Copyright (c) 1998-2014 Zend Technologies
Congratulations! Most difficult part of installation is now over. You have installed Nginx with PHP-FPM on your server.
4) Install MySQL
sudo apt-get install mysql-server mysql-client
You will be asked to provide root password for MySQL. Please provide a secure password. Then execute mysql_secure_installation command to make your MySQL installation even more secure.
root@authcache:/usr/share/nginx/html# mysql_secure_installation


NOTE: RUNNING ALL PARTS OF THIS SCRIPT IS RECOMMENDED FOR ALL MySQL
      SERVERS IN PRODUCTION USE!  PLEASE READ EACH STEP CAREFULLY!


In order to log into MySQL to secure it, we'll need the current
password for the root user.  If you've just installed MySQL, and
you haven't set the root password yet, the password will be blank,
so you should just press enter here.

Enter current password for root (enter for none):
OK, successfully used password, moving on...

Setting the root password ensures that nobody can log into the MySQL
root user without the proper authorisation.

You already have a root password set, so you can safely answer 'n'.

Change the root password? [Y/n] n
 ... skipping.

By default, a MySQL installation has an anonymous user, allowing anyone
to log into MySQL without having to have a user account created for
them.  This is intended only for testing, and to make the installation
go a bit smoother.  You should remove them before moving into a
production environment.

Remove anonymous users? [Y/n] Y
 ... Success!

Normally, root should only be allowed to connect from 'localhost'.  This
ensures that someone cannot guess at the root password from the network.

Disallow root login remotely? [Y/n] Y
 ... Success!

By default, MySQL comes with a database named 'test' that anyone can
access.  This is also intended only for testing, and should be removed
before moving into a production environment.

Remove test database and access to it? [Y/n] Y
 - Dropping test database...
ERROR 1008 (HY000) at line 1: Can't drop database 'test'; database doesn't exist
 ... Failed!  Not critical, keep moving...
 - Removing privileges on test database...
 ... Success!

Reloading the privilege tables will ensure that all changes made so far
will take effect immediately.

Reload privilege tables now? [Y/n] Y
 ... Success!

Cleaning up...


All done!  If you've completed all of the above steps, your MySQL
installation should now be secure.

Thanks for using MySQL!
Now we need to create a database in the MySQL server that Drupal can use. Log into the MySQL admin console using the command:
mysql -u root -p
You will be asked for a password. Once you are logged in, execute the following queries to create a database named "drupal" that is accessible by user "drupaluser" with password "drupalpassword".
mysql> create database drupal;
mysql> create user 'drupaluser'@'localhost' identified by 'drupalpassword';
mysql> use drupal;
mysql> grant all on drupal.* to 'drupaluser'@'localhost';
5) Install and configure Drupal
Go to /usr/share/nginx directory, delete the html directory and download and uncompress the latest version of Drupal there.
cd /usr/share/nginx
sudo rm -rf html
sudo wget http://ftp.drupal.org/files/projects/drupal-7.34.tar.gz
sudo tar -zxvf drupal-7.34.tar.gz
sudo mv drupal-7.34 html
sudo rm drupal-7.34.tar.gz
Now go to /usr/share/nginx/html/sites/default directory and create files folder and settings.php there.
cd /usr/share/nginx/html/sites/default
sudo mkdir files
sudo chown -R www-data files
sudo cp default.settings.php settings.php
sudo chmod 777 settings.php
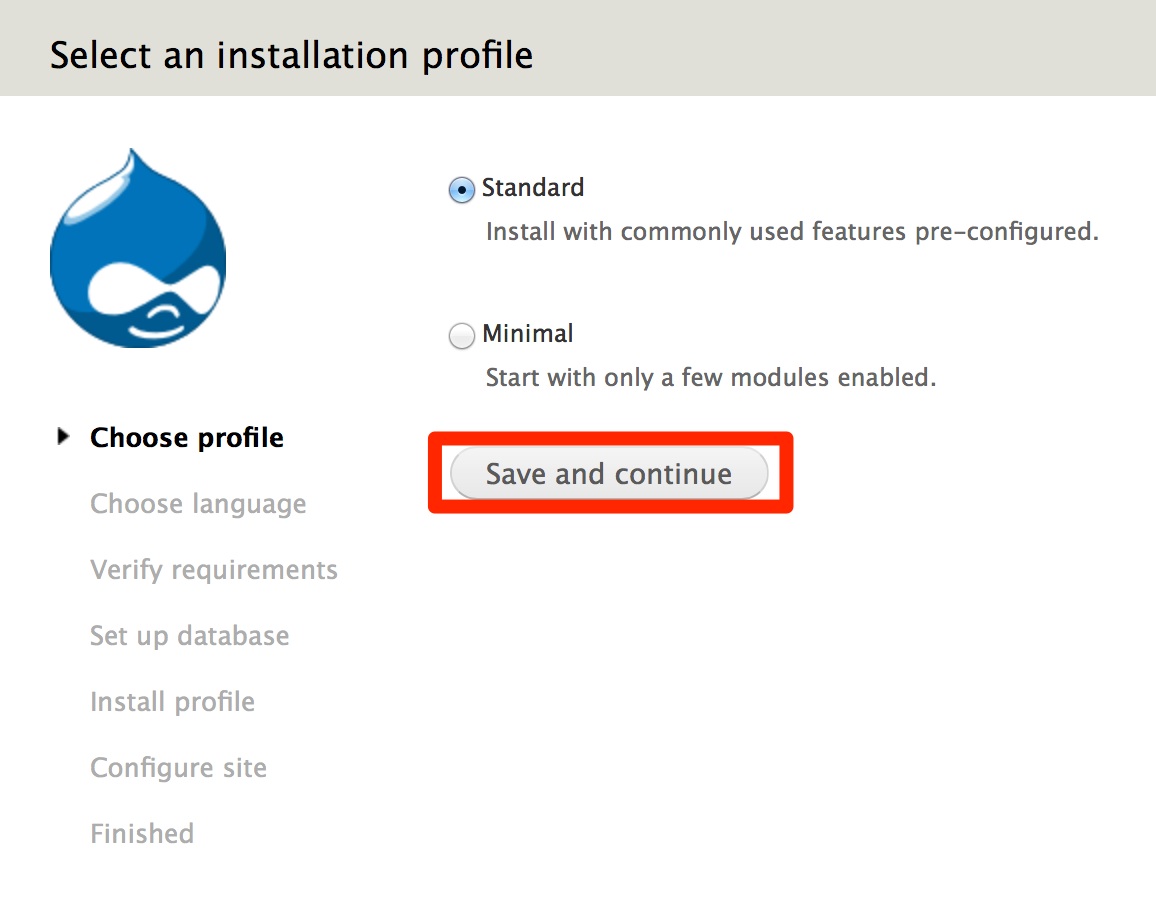
Now go to the server using the browser. You will see the screen to install Drupal. In the first step, install the profile that you want. We selected the Standard profile.
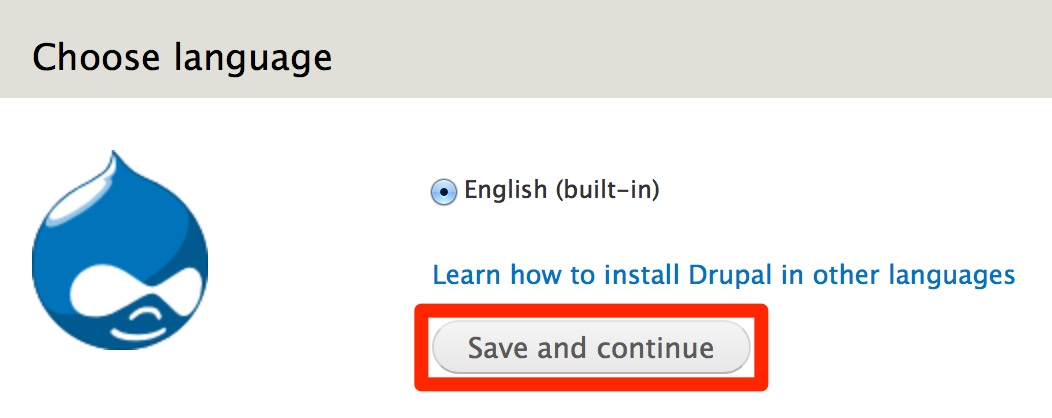
In the second step, choose the language in which you want to build the site. By default, you will get only one choice: English. Select that and proceed to the next page.
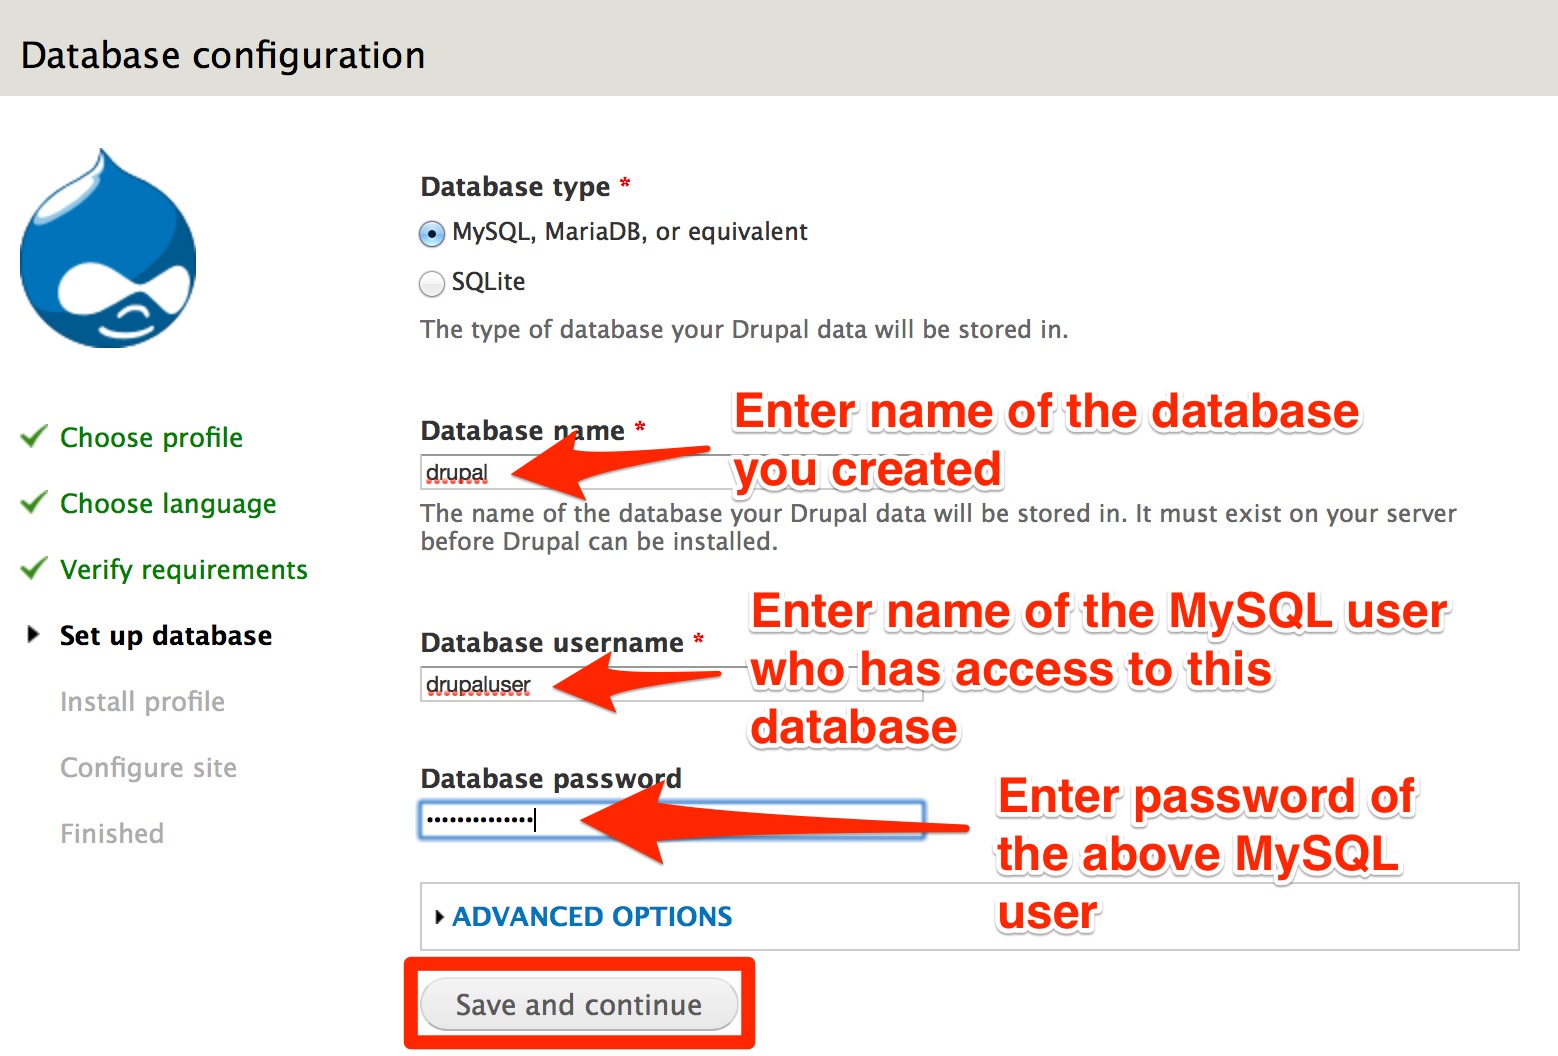
In the next step, you need to provide Drupal with the database access information. This is the name of the database that you created for storing Drupal's data. In this example, the database we created was named "drupal". We also need to provide Drupal with the username and password for the MySQL user who has access to this database. In this example, we provide "drupaluser" and "drupalpassword". Note that you could have provided "root" and the root password but it is not recommended since it's a security risk.
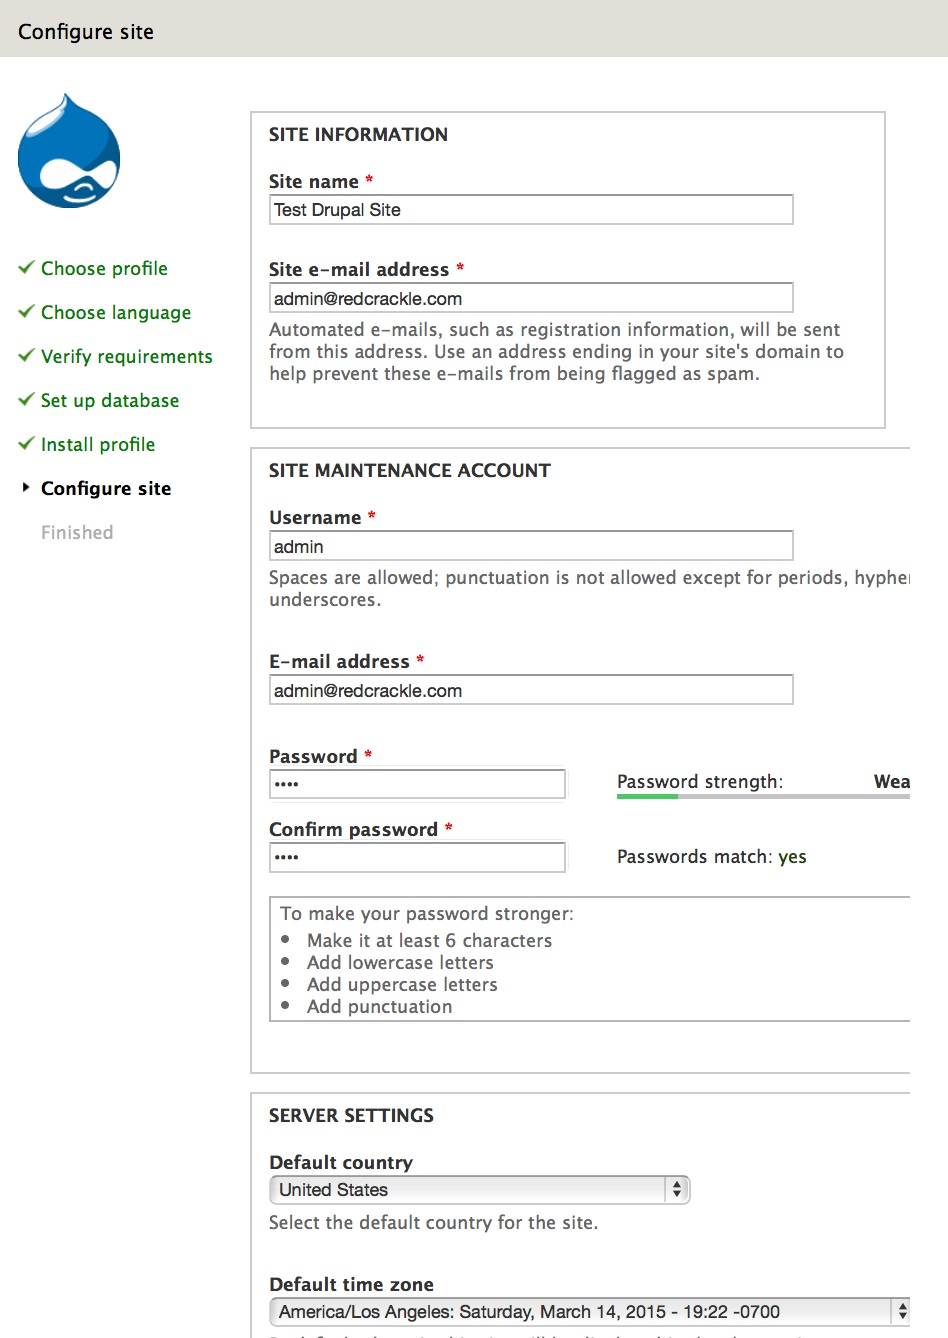
Now Drupal will install the installation profile you selected and then will ask you to fill in the details about the new site that you are creating. On top of that page, it will ask you to secure the access to settings.php file.

So let's go back to the terminal in the server and change its permissions.
cd /usr/share/nginx/html/sites/default
sudo chmod 644 settings.php
Now go back to the browser and refresh the page. The above warning should go away. In the form, enter details about the site and the admin and go to the next page.
Voila! Your Drupal installation is complete and you should see a screen informing you of the same.

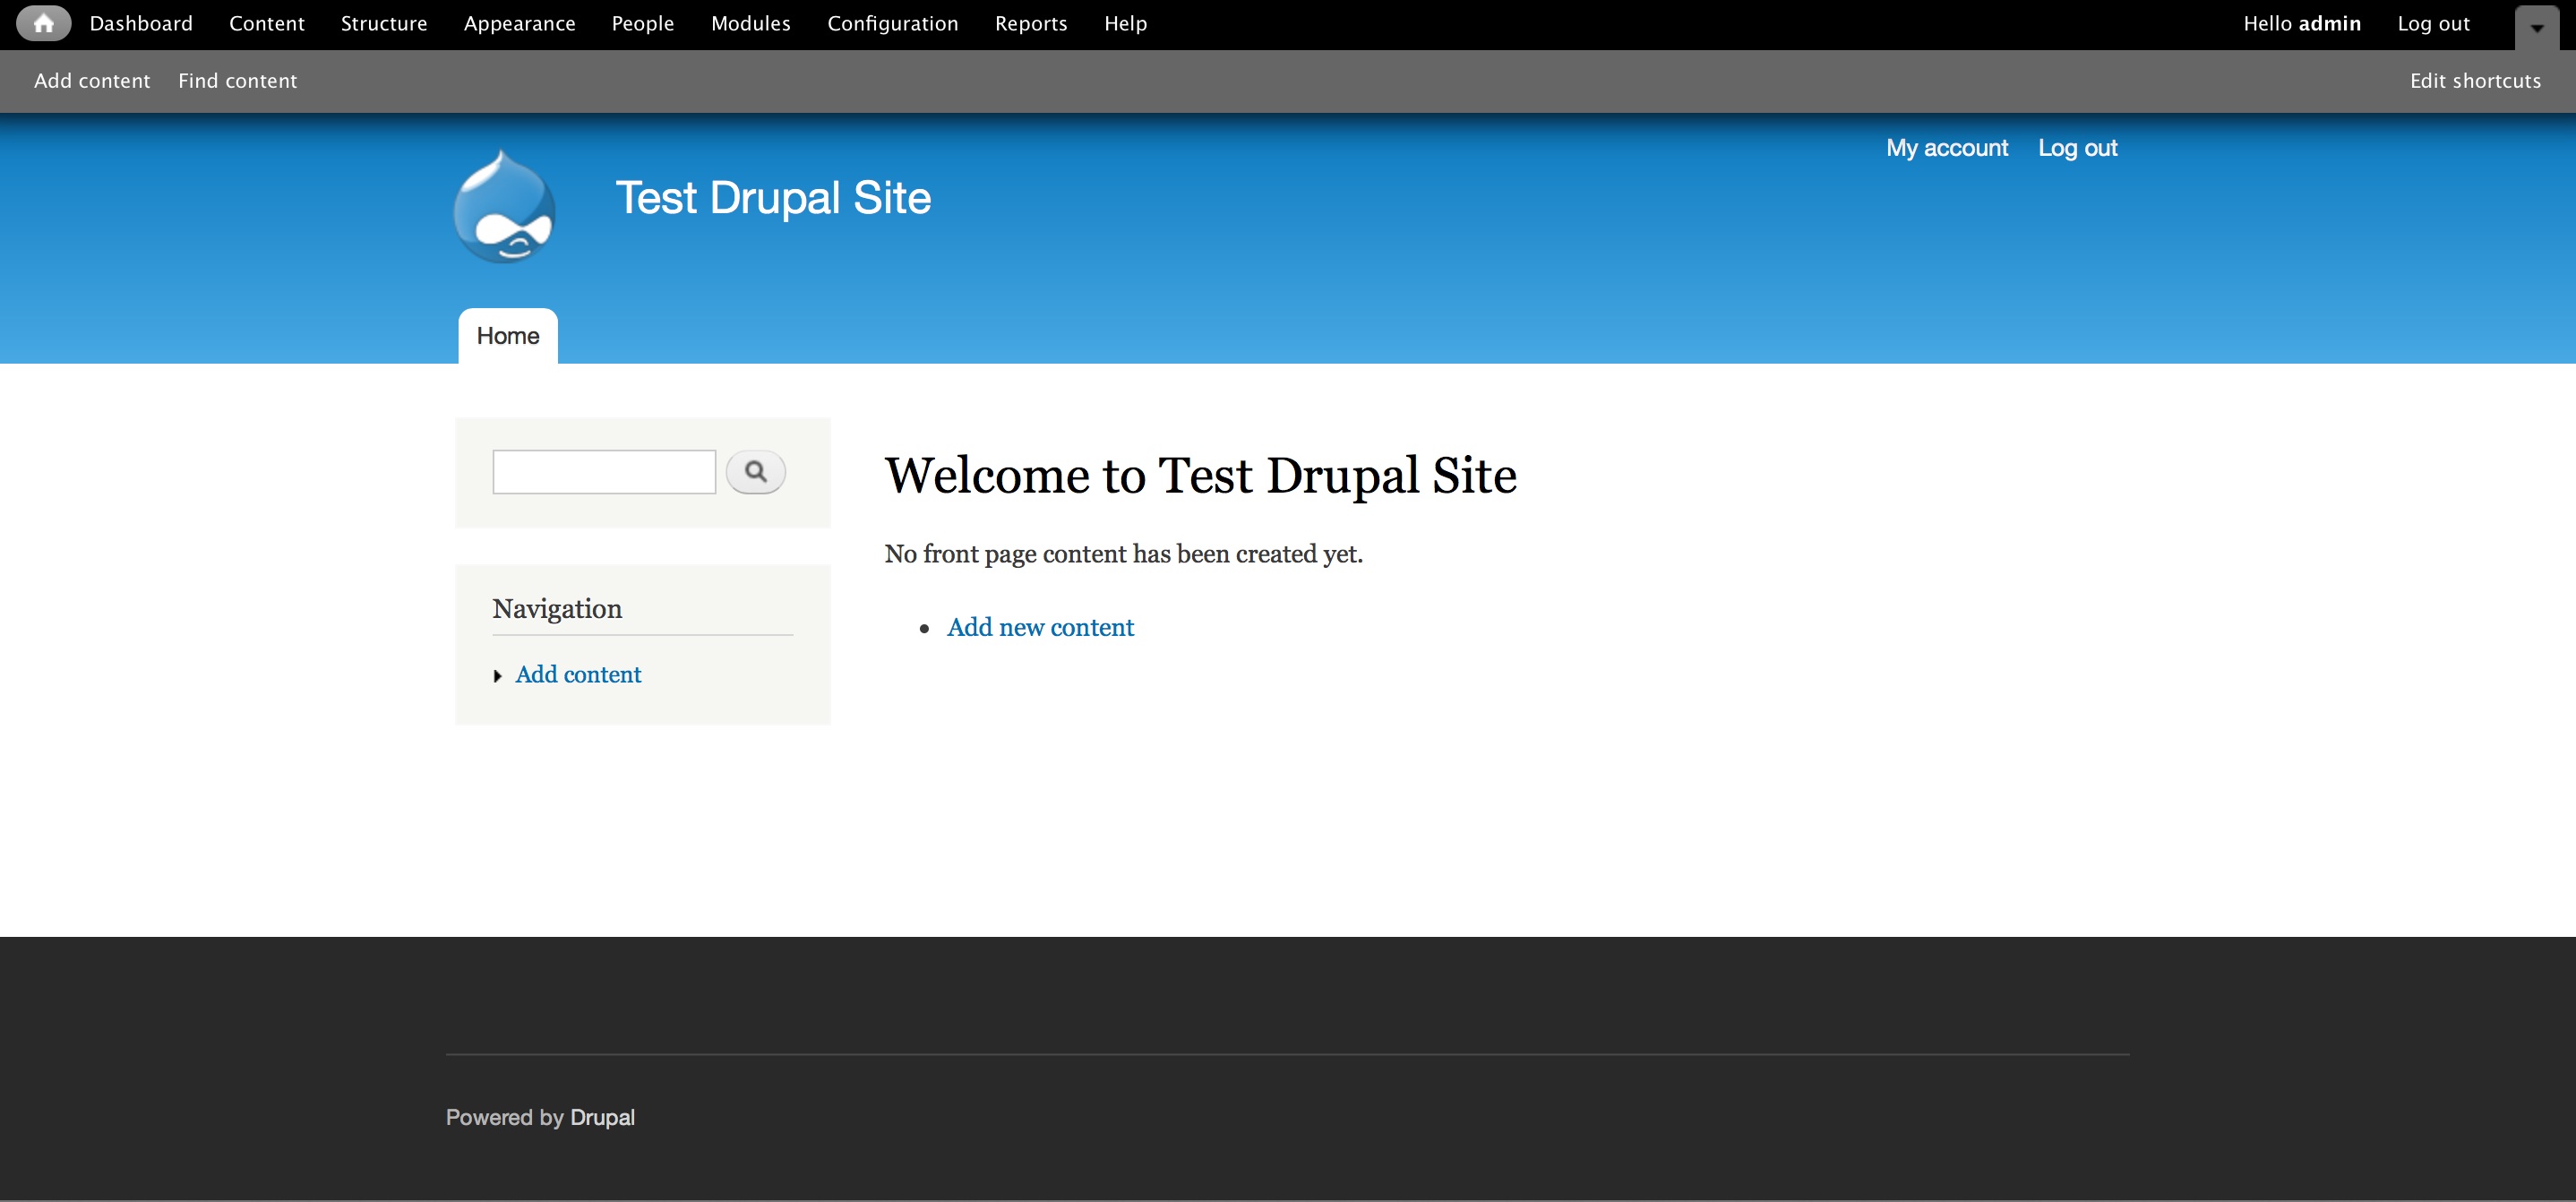
Click on the link "Visit your new site" to go to the site's homepage.
That was easy, wasn't it? Please feel free to add comments below if you have any suggestions or questions about this blog post.
Comments
Drupal 7 and PHP 5.5
FYI, Drupal 7 core works just fine with PHP 5.5, and most of my D7 infrastructure is running on 5.5 on either Ubuntu or CentOS without issue. There are a few bad contrib modules that cause issues, but all the major (top 100 or so) ones seem to work just fine.
Thanks!
D7 works fine on PHP 5.5
Can you correct the article so it makes it clear that Drupal core works fine in PHP 5.5. Some one or a search engine may read it and it will spread misinformation.
Done
Thanks for the article.
Thanks for the article.
Could you provide the list of contributed D7 modules you are using that are incompatible with PHP 5.5
Don't know
Upcoming sprint
Thanks for the post.
Thanks for the post.
It worked flawlessly.
But i would like to know what changes do i have to make in order to get the Clean URLs in drupal 7, presently, with the above setup.the clean urls does not work.
Clearn URLs should work
I too have struggled to make
I too have struggled to make Clean URLs work, I only can access the front page with the current configuration. I used the above configuration strictly though... What's missing ?
Clean URLs
Memcached
Thanks Neerav, I have followed you instruction and it is working fine. Now I am heading towards installing memcached & varnish. Did you implement this one on your server?
Memcached and Varnish
one moment
to install php-fpm with apt-get you need to run:
add-apt-repository ppa:ondrej/php5-5.6
Regarding image style
Hello All,
Any one can help me Regarding the image style not working with drupal 7 - nginx on rackspace server.
images are not generated by drupal image style.
thank you,
vindesh mohariya