In this article you will be learning how to change the default font in WordPress.
First you will need to install a plugin before you can change your fonts.
Installing Easy Google Fonts plugin
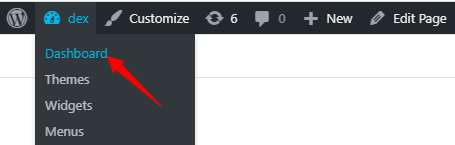
- Open the Dashboard from the top left on your website.
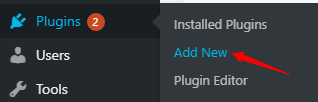
- On the left sidebar scroll down, hover above Plugins, and click on Add New.
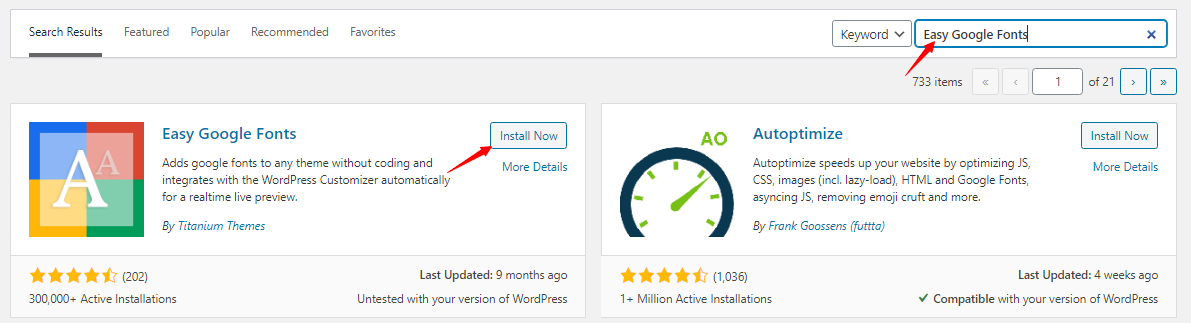
- Search for Easy Google Fonts, and proceed by clicking on Install Now.
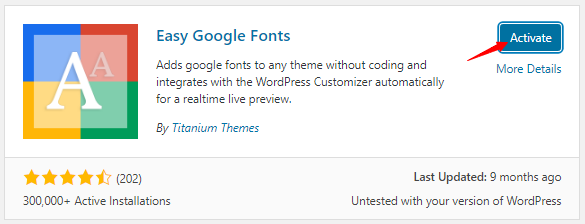
- Next, click on Activate.
- The Easy Google Fonts plugin will be successfully installed.
Changing your fonts
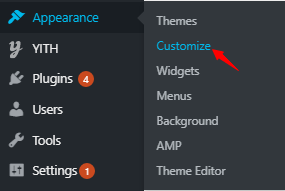
- Navigate to the left sidebar, hover your cursor above Appearance and click on Customize.
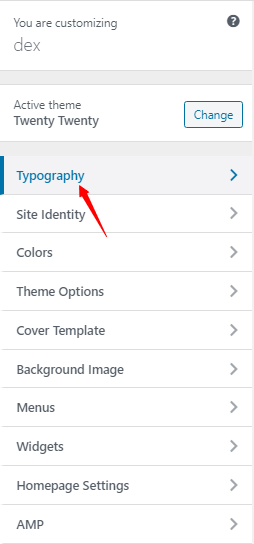
- Proceed by clicking on Typography.
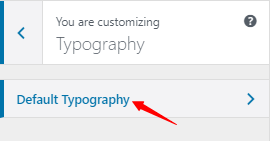
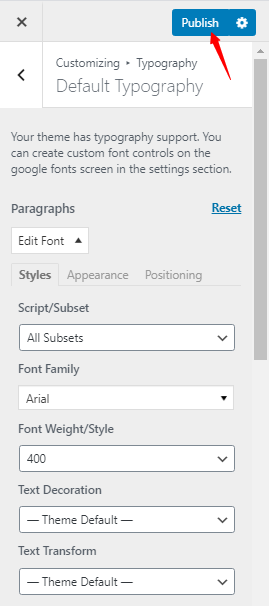
- Next, click on Default Typography.
- Here you can see all the different types of text for which you can change fonts. Choose the type of text you wish to edit by clicking on Edit Font. We are editing all of them.
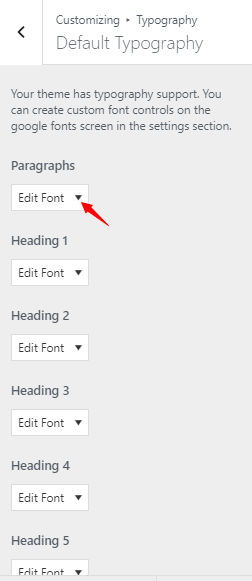
- Next, click below the Font family and a drop-down list will appear. Proceed by choosing your desired font type by clicking on it. We have done this for all of them.

- After making changes to all the text types, finally, click on Publish to save your settings.
- You can see the Published icon meaning you have saved your settings and applied your new fonts.

- Here is a preview of the page with all headings with Arial font.