The primary goal of Drupal Pathauto module is to automatically generate aliases for all kinds of content types. These aliases are based on configurable rules that can be set up by you. This module will help you give the URLs on your website a clearer structure and easier readability. A clear URL will also ensure your link gets noticed by search engines.
If you have experience working with Drupal, then you may have already dealt with Pathauto. This article is targeted at newbies who haven’t worked with this module yet.
Why is Drupal Pathauto important?
By default, Drupal's internal links look like these: user/150, node/180 and so on. If you build a site without the Pathauto module, your URLs will look weird and out of place. For example, mywebsite/user/150 or mywebsite/node/180.
The essentials
In order to get started, you will have to download and install the following modules: Pathauto, Token and Global Redirect.
Getting started
Go to the admin area. Under modules, search for the Pathauto module recently installed by you. Once you find it, you will have to click on the Configure link on the right as shown below:
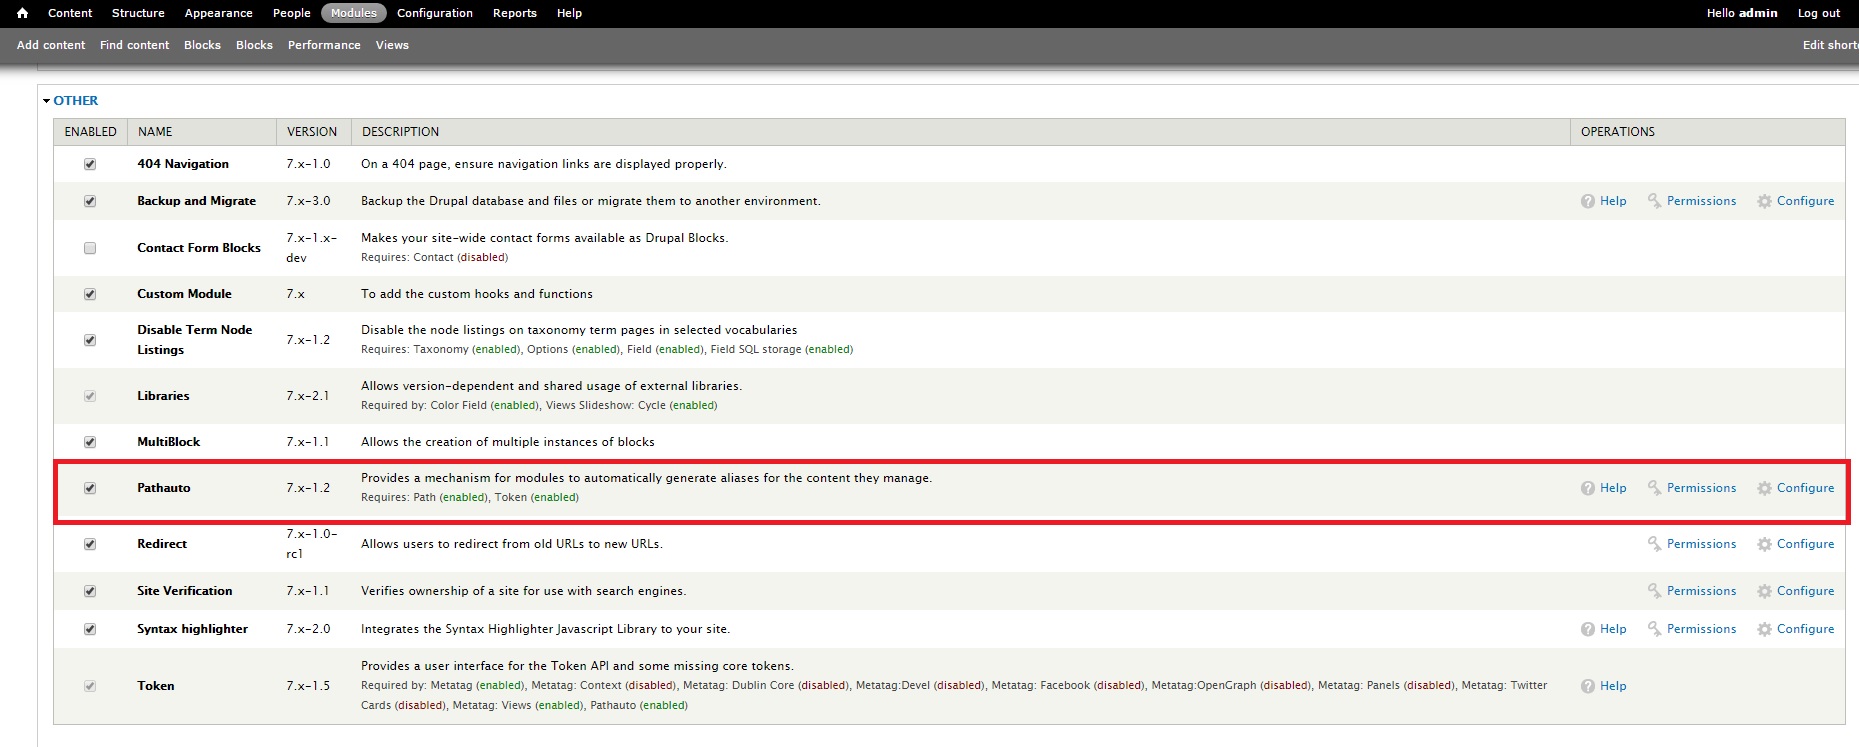
Notice the 5 tabs on the right. This is where all the action is.

We will go through each tab to explore them in detail.
1. LIST: Click on this tab to view all aliases used on the page.

You can add an alias by clicking on the Add alias link. This takes you to a new page that asks you to provide the current system path and the alias you wish to assign to it. Enter the alias as desired by you.

2. PATTERN: This is where you can set up new patterns for aliases. You can set up patterns for all content types, including articles and basic pages
And if you don't explicitly mention a pattern, it takes the default value provided in the Default path pattern box as shown below.

Why not create a pattern for the article content type?
Let's go ahead and enter a pattern for the Articles. We will go with the most common one used: article/[node:author][node:title]
This is how you go about it:
First, you will have to type in "article/" in the box. Then, click on REPLACEMENT PATTERNS. Expand Nodes as shown below:
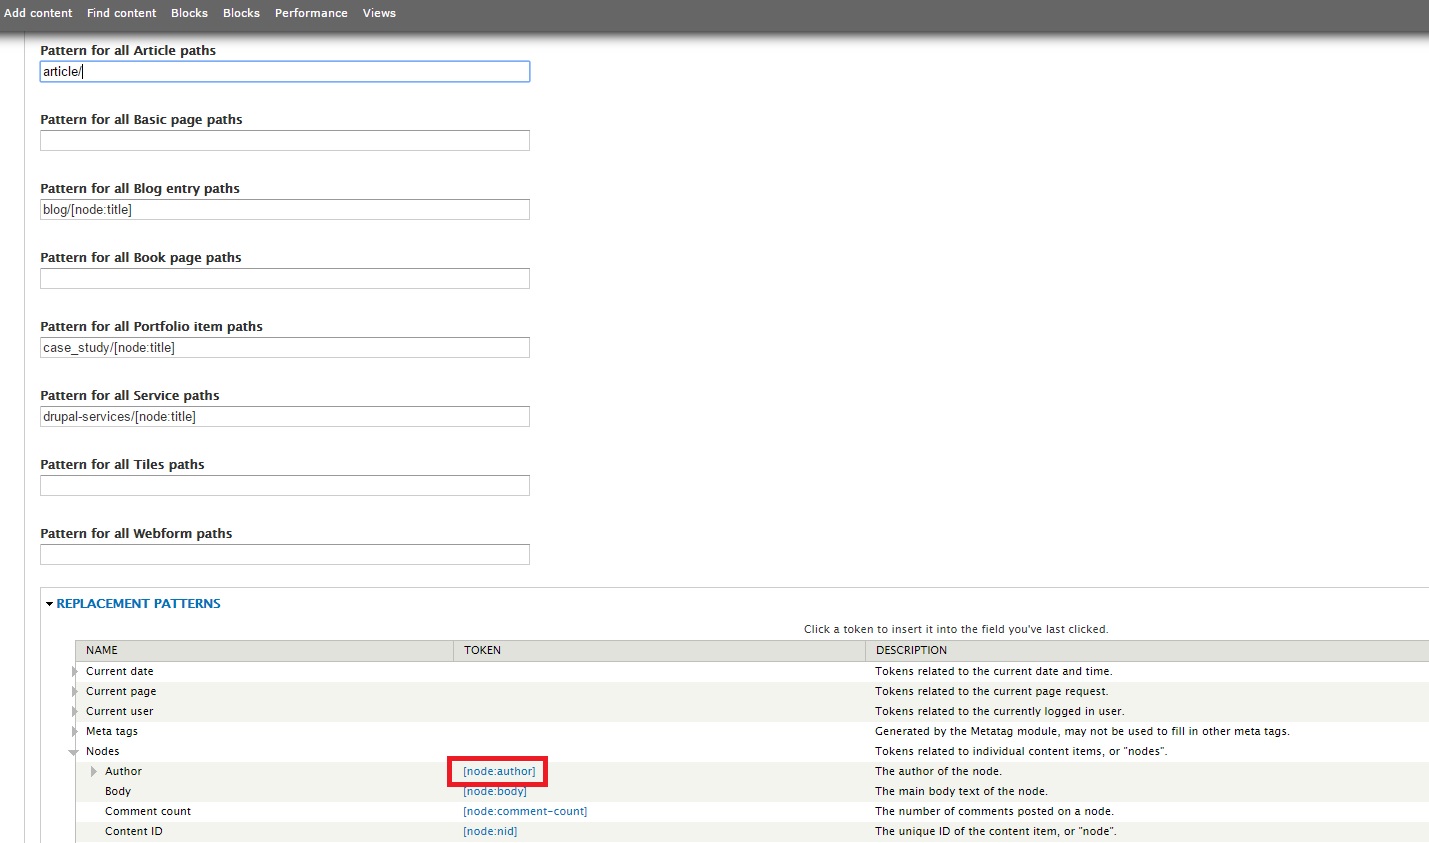
Select [node:author] and [node:title]. And voila, your field is ready:
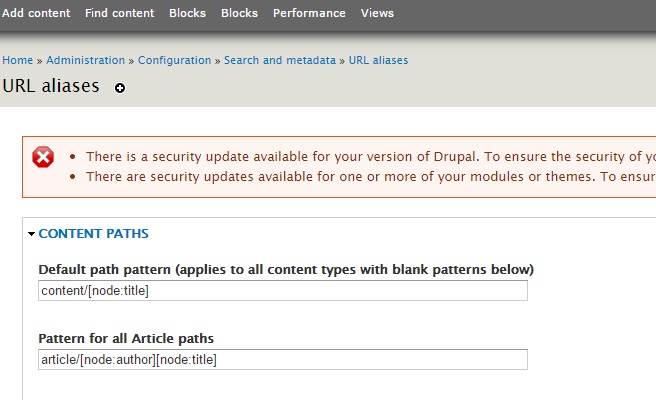
Go ahead and test the new pattern. Create a test article and publish it. The URL generated will correspond to the pattern specified by you above.
3. SETTINGS: This section specifies the conditions according to which the URL aliases are created. Here are the fields on this page:
- Separator: Specify which symbol you wish to separate the phrases in your URL. Go for the traditional '-' symbol.
- Character case: It is recommended to select the radio button for Change to lower case. This ensures your alias converts the URL alias to lower case by default.
- Maximum alias length: Specify the value as 100, which is the recommended length as well.
- Maximum component length: Specify the value as 100, which is the recommended length as well.
- Update action: What do you want Pathauto to do while updating existing content with a new alias? It's recommended to select the radio button Create a new alias. Delete the old alias.
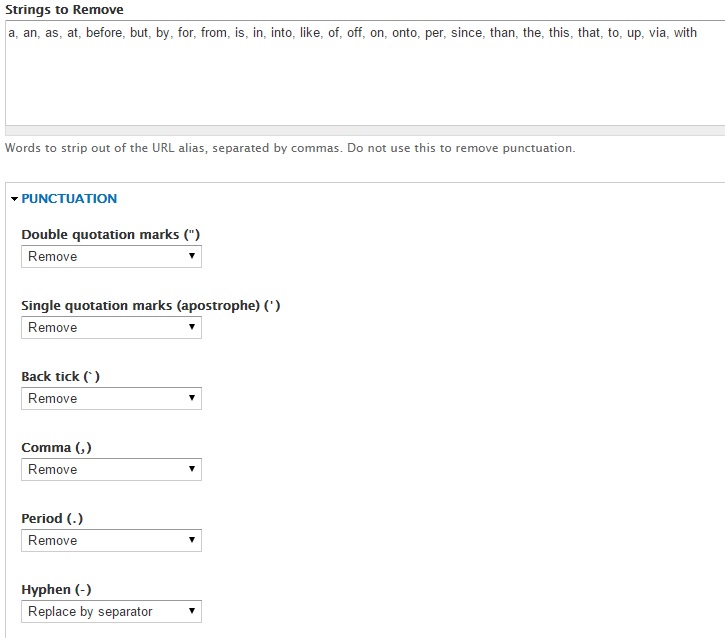
- Strings to Remove: This field features words that will be automatically removed from the title during URL generation.
- Punctuation: Which punctuations do you want featured on your aliases? Ideally, except for hyphen (-), it's important you choose Remove in the dropdown for all other punctuation fields.
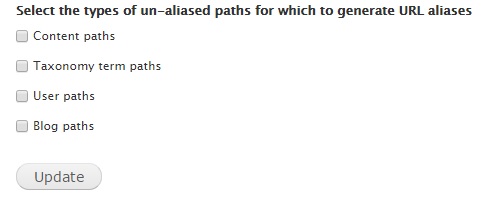
4. BULK UPDATE: Bulk update creates aliases for entities belonging to specific content types. They work on entities that don’t yet have a Pathauto alias of their own. In most probability, you will have to check the box against Content paths and click Update.
If your goal is to update all existing aliases, you will have to visit the DELETE ALIASES tab first.
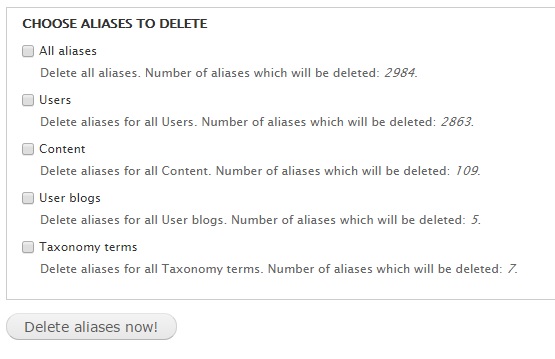
5. DELETE ALIASES: This section allows you to delete aliases in bulk. You can check one or more of the following boxes:
- All aliases: Deletes all aliases created prior to generation of new aliases
- Users: Deletes all aliases pertaining to Users prior to generation of new aliases.
- Content: Deletes all aliases pertaining to Content prior to generation of new aliases
- User blogs: Deletes all aliases pertaining to User blogs prior to generation of new aliases.
- Taxonomy terms: Deletes all aliases pertaining to Taxonomy terms prior to generation of new aliases.
Use this section with caution, especially if your site is being tracked by search engines. Make sure you have the Redirect module installed to ensure no broken links are thrown up.
